 By Maurice Rangoma
 One of the key expense in a dairy farm is feeding the dairy cows. The farmer therefore needs to know what works for the cow, whether the cows are underfeeding or overfeeding, and this poses major challenges to most farmers.
The normal feeding practice for many dairy farmers is to provide a constant amount concentrate throughout the lactation period. The concentrate is restricted on a certain level, usually 2 to 3 kg daily or less, while the roughage is fed either at will or in a mix. The disadvantages of this strategy are the increased risk for
metabolic disturbances and the difficulty to reach high peak yields. However, the technique is simple and therefore the investment cost can be relatively low.
Concentrates in Kenya, as in other parts of the world, are expensive therefore it is important to use them effectively. Inefficient feeding induces risk of metabolic diseases and dropped milk yield which are a sources of monetary losses.
There are two strategies that are recommended for feeding concentrates:
This method is recommended for cows in early lactation. Start with low levels of dairy meal or suitable dairy concentrates about 4 kg per day and increase this amount by 0.5 to 1 kg per day as long as there is an increase in milk production until the point at which further increase does not result in an increase in milk production. Maintain this amount until the milk production starts dropping then reduce the amount of concentrate gradually. Every cow is given the maximum ration that she can consume, without reducing her roughage intake. By using this strategy each individual cow is given the opportunity to show her production potential.
As a rule of thumb, 1 kg increase in concentrate fed should result in an increase in production of milk of 1.5 to 2 kg. Feeding concentrates is economical only as long as the price of I.5 kg milk is higher than the price of 1 kg concentrate.
The downside of this method is that when the peak production is reached and the production starts to decline, there is a risk of overfeeding. The advantage is that the cow’s body condition is maintained and the feed is used as efficiently as possible. A successful implementation of this strategy means increased milk production with the feed cost well under control.
Experience indicate that increasing levels of concentrates increases milk yield, especially during early lactation. Research also demonstrate that the level of nutrition during the first weeks of lactation has major effects on total lactation performance. Nutritional interventions can transform lactation curves by the strategic reallocation of fixed yearly quantity of concentrate to the early part of lactation.
Concentrate re-allocation takes place in early lactation, when there is a strong chance of underfeeding. If the cow requires ten bag in a year, concentrate reallocation means feeding all of the ten bags during early lactation and providing just good quality forage for the rest of the lactation. This would amount to about 8 kg concentrates per day for the first 12 weeks of lactation. If the cow is not already accustomed to concentrates, after calving start off by giving 2 kg and increase gradually over the first week to 8 kg.
Advantage of feed reallocation
 By Maurice Rangoma
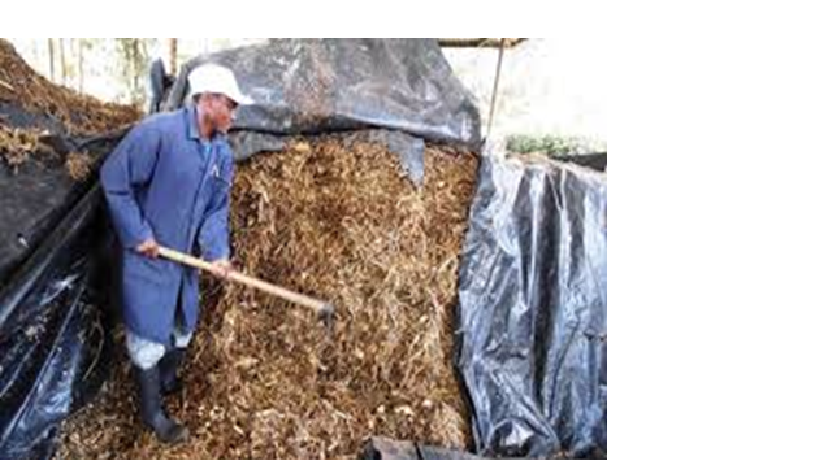
 High-quality silage is the result of adoption of appropriate techniques, starting with soil preparation and fertilization. The crop must have high dry matter content, adequate nutritional value, and good characteristics for fermentation during the ensiling process. Even if high-quality crops
 By Maurice Rangoma
 The various species of leucaena are perennial, deep-rooted, large shrub/small tree legumes growing up to 20 m tall. They have compound leaves with many thin leaflets, white flowers and produce a lot of seeds in pods.
Leucaena has many uses, the leaves are a very good source of protein and can be used in both cut-and-carry and open grazing production systems. Re-growth occurs very fast after cutting.
It can be used as shade in plantation crops, as living supports for climbing crops, such as passion fruit, and also for soil conservation and, being a legume, aids maintenance of soil fertility. Te mature shrub can be cut for poles for fencing and wood fuel and as bee forage.
Drought tolerant, highly digestible and palatable forage supplement.
High mimosine content which can be poisonous in large amounts; can become a weed due to its prolifc seed production
| Climate | Leucaena grows from sea level up to 1900 m but performs best up to 1000 m above sea level. It does well in areas with rainfall above 600 mm per year |
| Soils | It grows best on deep, well drained clay soils and does not do well in acid soils. |
| Site | Leucaena may be planted as single plants, single hedgerows or multiple hedgerows, in cut-and-carry plots, grazed plots, along boundaries or even along contours for soil erosion control. |
| Preparation | Torough seedbed preparation is required. Plough and harrow to make a fne seedbed. |
| Sowing |
Leucaena is established from seeds which can be sown either directly into the feld or in a nursery. To break seed dormancy, soak in warm water for 48 hours, or in boiling water for 4 seconds, or nip the broad (round) end. Inoculate the seed with the correct rhizobia. Make a sticking agent by mixing 2 parts sugar with 1 part of warm water. Mix the sticker thoroughly with required amount of inoculant, following the instructions on the pack. Pour the seeds into the mixture and mix until every seed has a fne sticky coating. Spread the seed to dry in cool shade for 15 to 30 minutes. Plant immediately. For direct sowing in the fnal growing site, make furrows 3 to 10 m apart and sow the seed at a rate of 1 to 2 kg per hectare, planting the seeds 2 to 3 cm deep. For nursery propagation, use plastic tubes flled with free-draining soil, sand and manure in the ratio of 3:2:1. Sow two seeds per tube. Water regularly as required and control weeds by hand pulling. One week after the seedlings emerge, thin to one seedling per tube. Transplant seedlings when they are eight weeks old. For a pure stand, prepare holes spaced 1 m by 1 m and at least 30 cm deep. For alley cropping or grazing, allow a spacing of 75 cm between plants and 3 to 10 metres between rows. Remove plastic tubes and place the seedling in the holes. Cover with moist soil and frm around the seedling. |
| Fertilizer | At the time of transplanting, apply triple super phosphate fertilizer at the rate of 120 kg per hectare, or one tablespoon per hole, and mix with soil. |
| Weeding | Leucaena seedlings are very susceptible to weed competition, therefore make sure the plot is weed-free when the seedlings are small. |
| Pests |
The psyllid insect (Heteropsylla cubenseis) is the most important pest and it can wipe out the entire crop, especially of the species L. leucocephala. To control it, plant species that are resistant to this pest such as L. diversifolia. Biological control using a beetle and a parasitic wasp is showing promise. Damping-off is an important fungal disease affecting seedlings in the nursery. This is controlled by avoiding excess watering and using free-draining soil. |
| Harvesting |
Start harvesting at the beginning of the second wet season by cutting back to 50 cm above ground level. Cut twice during the wet season when re-growth is 50-60 cm, or once at the end and conserve as dry leaf meal. First grazing may be done when the plants are 1.5 m in height but it should be light at frst. Avoid heavy grazing until the plants are fully mature, from 1 to 3 years old. Grazing or harvesting When well managed, leucaena can yield up to 2 tonnes dry matter per hectare per year. |
| Feeding | Leucaena is a high quality, very palatable supplementary forage. It is best cut and fed fresh or as dry leaf meal. Feeding excessive amounts can cause bloat and hair loss, therefore leucaena should not make up more than 30% of the total ration. Leucaena leaves can be dried and fed as dry leaf meal |
 By Maurice Rangoma
 Desmodium is a trailing or climbing perennial legume with small leaves and deep roots which, in favourable conditions, forms very dense ground cover. Desmodium is popular in cut-and-carry systems.
There are numerous varieties of desmodium but the two most common are the green leafed and the silver leafed ones. Green leaf desmodium is leafer with reddish brown to purplish spots on the upper surface of the leaves and reddish brown stems. Silver leaf desmodium has stems and leaves covered in dense hairs which make them stick to hands and clothing. It has green and white leaves which are light green underneath.
High quality, protein rich forage; can be grown between or under other crops - as it fxes nitrogen it increases yields and reduces the need for nitrogen fertilizer.
| Climate | It does well in warm, wet regions at altitudes of 800 m to 2500 m receiving at least 875 mm rainfall per year. |
| Soils | Adapted to a wide range of soils from sands to clay loams and tolerates slight acidity but not salinity. Acidic soils can be improved by applying manure at the rate of 8 tonnes per hectare prior to sowing or planting. |
| Site | Desmodium can be grown as a pure stand or as a mixture with Napier grass in cut-and-carry plots. It can also be grown under a maize crop or even as a cover crop under bananas or coffee. |
| Preparation |
Desmodium seed is relatively expensive, very small and the seedlings can be swamped by weeds, so it is best sown in a weed-free, well prepared nursery seedbed with fine textured soil. A seedbed 3 m by 3m, raised 15 cm high, will require about 100g of seed. Desmodium needs to grow in close association with a group of very benefcial bacteria called rhizobia. These bacteria live in the roots of desmodium and other legumes and can fx nitrogen from the air, which is then available as a free fertilizer to the desmodium plants. |
| Sowing |
Te best time to plant is at the start of rains. For areas with two rainy seasons, sow seeds during the short rains but plant cuttings during the long rains. Sow the seed immediately after adding the inoculant. The seeds can be sown either by drilling or by broadcasting. For drilling, make shallow furrows about 5cm deep spaced 30cm apart. Cover the seed with 1 cm of soil and press softly. For broadcasting, spread the seed evenly over the seed bed. The nursery bed should be watered carefully and often. Shade may be provided but it should be removed soon after germination. Desmodium can also be established from cutting. Compared to seed, cuttings are bulky but can be obtained at little or no cost from a neighbour and they compete well with weeds during establishment. Get cuttings from an established nursery or from desmodium in the field. Desmodium cuttings should be vines 60cm long with soil still attached to the new roots. Make furrows 30cm apart and 10cm deep Desmodium can be grown between rows of Napier grass. Plant the Napier grass at a spacing of 1m between plants and, wider than usual, with 2m between rows. Make holes between rows of the newly planted Napier. Plant desmodium cuttings 30 cm apart, as you would sweet potato vines. When grown together with Napier, desmodium adds nitrogen to the soil, benefting the Napier and reducing the amount of nitrogen fertilizer required for topdressing. Once desmodium has fully established, it forms a complete ground cover which smothers the weeds, thus reducing the labour requirement and cost of weeding the Napier plot. |
| Fertilizer |
Apply 500g of phosphate fertilizer, TSP (45% P) or DAP (46% P, 18% N) to the 3m by 3m plot before sowing and mix thoroughly with soil. Alternatively add 15 kg dry farmyard manure to the seedbed before planting. When growing desmodium with Napier grass, add one handful of farmyard manure per hole at planting and mix thoroughly with the soil. Also apply 2 bags TSP or DAP fertilizer per hectare during heavy rains and after every cut apply manure in a furrow and cover with soil. |
| Weeding | Keep the plot weed-free especially during the early stages of establishment. When well established, desmodium is able to suppress weeds. |
| Pests |
Common pests are aphids and the Amnemus weevil, both of which can be controlled by use of insecticides: be careful to strictly observe use and safety instructions on the pack. If aphids are not controlled, they may transmit a viral disease known as little-leaf. A fungal disease, anthracnose, can affect desmodium especially in poorly drained soil. |
| Harvesting |
Desmodium pure stand: Start harvesting after at least four months. Te best harvesting regime is to cut at 12-week intervals at no less than 10cm above soil level. Desmodium – Napier mixture: First harvest should be at least four months after establishment or when the Napier is about 1 m high and at an interval of 4 to 10 weeks thereafter. Cut the desmodium and Napier together. Leave stumps of 10 to 15 cm above the ground for both crops. |
| Feeding |
Desmodium is a good quality supplementary forage with a high protein content. It should be given in small quantities mixed with basal fodders. Harvest just what is needed and spread it in the sun for a few hours to wilt. Chop and mix thoroughly with other forages, such as maize stover or Napier grass, then feed to the animals. Tree to six kilograms of green desmodium is equivalent to one to two kilograms of the commercial concentrate. Excess desmodium may be cut, dried and baled into hay and used as a protein supplement. It can also be mixed with grass when making hay. |
 By Maurice Rangoma
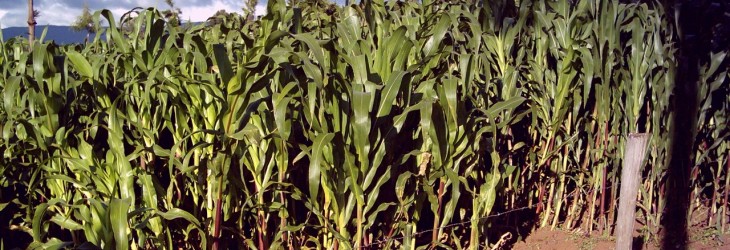
 It is possible to obtain both fodder for dairy animals and grain for household use or sale from a single crop of maize. This involves planting maize more densely than is usual when growing maize just for grain. Fodder from maize is a good alternative when other fodder crops regenerates too slowly, as can happen after severe drought or frost. It is possible to produce as much as 40 tonnes of green forage per year per hectare by planting maize densely.
Fodder can be obtained from a maize crop by:
Plant 4 or 5 instead of the usual 2 seeds per hole to increase the number of plants and hence the amount of available fodder:
• Apply double the usual amount of fertilizer or manure: 20 g (two teaspoons) fertilizer instead of the usual 10 g (one teaspoon) or four handfuls instead of the usual two handfuls of manure per hole at planting
• Dig holes double the normal size and spread the maize seeds evenly.
Reduce the spacing of the planting holes to 30 cm between holes and 60 cm between rows to increase the number of plants. Apply fertilizer and manure at the usual rate: 10 g of fertilizer or two handfuls of manure per hole at planting.
Page 1 of 8